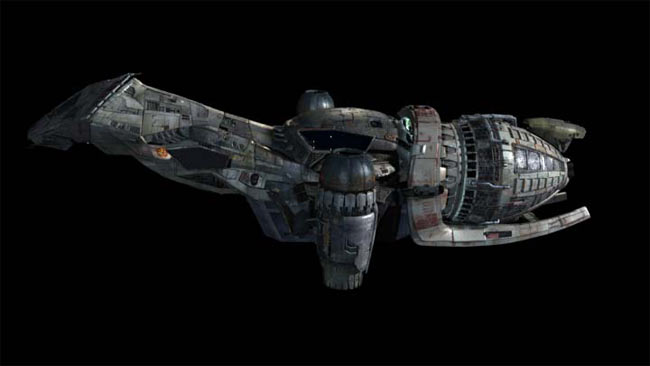
Firefly Unisystem


You started on Atlas, a dodgy trading settlement with a number of saloons and a famous place for R&R among the privateers of the 'Verse. It's a moon of Bellerophon, which has much more respectable trading centres. The rest of the crew (that may or may not exist) were recuperating from that other thing you all may or may not have just done. The mayor of Atlas, Jeremiah Payne, asked you up for a chat. You know he's a powerful figure who was involved in a lot of dodgy deals, and now he virtually owns the entire moon. He's a big fat businessman with a huge cigar and always seems to be surrounded by his four bodyguards.
He offered you a job, 15 per cent of the takings if you would pick over a recently crashed Alliance supply ship he has heard about. You talked about raising the price if things got dangerous and he kinda agreed, but was a bit vague, and he gave you a free tank of gas. Once you agreed to his terms he sent the coordinates of the ship over the cortex.
So you took off in your firefly and headed off to some asteroid belt a couple of days away. The first day's travel went fine. The second day, as you approached the asteroids, you got intercepted by the Alliance Cruiser, Dresden. After a brief argument about whether to go incognito or not, you sent them your real security codes, and after a few questions they sent you on your way with a warning that Reavers had been spotted in the area recently.
Oakley arsed about with your sensors a bit to see if he could improve them and made a decent job of it. TJ piloted the ship into the asteroid belt. He never claimed to be the best pilot that ever manoeuvred a Firefly, but he seemed to do pretty good (not hitting any asteroids) and sure enough, you arrived at the coordinates and not far away was a slightly damaged supply ship, 'the Lydgate,' nestled against a large asteroid. The ship looked like it may have crashed against the asteroid, but the life support systems seemed to be still working.
You approached to dock with it, but the docking didn't work, and you noticed that the Lydgate's docking gear may have been a bit damaged. So Sar and Oakley suited up and TJ brought the Enigma as close as he could and you made the short hop through space to the supply ship. The Lydgate's airlock worked fine and soon you were in. Oakley headed for the bridge and crew quarters and Sar to the cargo bay.
Oakley went into the Galley to see a bunch of bodies tied together hanging from the ceiling, dripping blood and seemingly killed in as painful a manner as possible. As far as you knew it looked like the work of Reavers. He also saw some movement coming from the common room next door. Sar opened the cargo bay door to see two dozen head of cattle, all perfectly fit, by the looks of them (actually a very valuable cargo).
Sar brought a couple of the cattle towards the air lock, and went to join Oakley, while Oakley went to investigate in the common room. As he opened the door he got surprised by a mad figure who attacked him with a knife slashing him through his space suit. The man was covered in blood and seemed to be wide eyed and mad. He might have been a Reaver (you've never really seen one before) but Oakley noticed that he was wearing an Alliance uniform. Oakley fought back, trying to knock the figure out by pistol whipping him. But he didn't go down. Then Sar shot him in the head and he died instantly. Oakley checked the body and found standard Alliance personnel dog-tags.
Meanwhile TJ noticed signs of a ship with an unshielded drive bearing down on your ship. You remembered rumours about Reavers not bothering to shield their drives, and feared the worst. TJ called across to the landing party to come back as soon as possible. Oakley used his computer to upload the Lydgate's flight log and grabbed one of the ship's space suits to replace his ripped one. TJ could see the unshielded ship was weird looking and covered in spikes and it had two large pincers that are usually used for breaking up scrap, making it look a bit like a crab.
TJ advised you to 'Take the cows, but leave the Reavers,' and Sar opened the airlock. All the contents of the Lydgate got sucked out into space, Sar and Oakley, and all the cows, too. They shot out of the airlock and smashed against the side of the Firefly. The cows started popping and freezing and frying, and stuff. Both Sar and Oakley managed to fire their grappling irons onto the side of the Firefly and winch themselves in. The Reaver ship neared, and at the last moment TJ fired up the engines and flew downwards away from the approaching Reaver ship. He dodged amongst the asteroids trying to avoid the Reavers while Oakley and Sar tried to make their way around the outside of the ship towards the airlock and the cargo bay.
TJ opened the cargo bay doors, and then pulled an emergency stop manoeuvre, whch fooled the Reavers and Reaver ship flew straight on. Sar managed to climb into the cargo bay, and with Oakley hanging onto the side of the ship, the Firefly shot off through the asteroid field, leaving the reavers in behind.
On the way back to Atlas, Oakley went through the log of the Lydgate. It seemed, as far as he could tell, to be an innocent but tragic case of a conventional supply ship running afoul of Reavers who were travelling closer to the core worlds than is usual.
Also on the way back, you contacted Mayor Payne. He was disapponted that you weren't able to get him his cargo. You told him that there had been none there when you got there. He expressed shock and surprise that the ship had been a victim of Reavers, and said he was glad that you were safe, but you got the impression that he knew that the Reavers were involved, and only sent you on the mission because he considered you expendable. Payne told you you owed him for the tank of gas he had given you, but apart from that you'd be welcome back in Atlas City any time. We leave you heading back towards Atlas City to pick up the rest of the crew that may or may not exist.
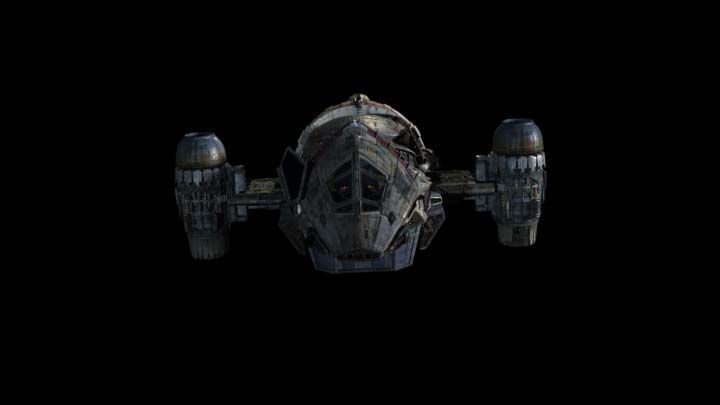
You were aproaching Atlas when Oakley got a hologram via the cortex. It was his old flame Jennifer Ling.
Hi Oakley-dokely, baby,
It's me, well, yeah, I guess you can see that can't you? Anyway as you can see they're holding a gun to my head. These boys don't mess around. They're serious. They say they want your box o' tricks and they want it like yesterday. So, you gotta bring it, or I'm a goner. I know we didn't part on the best of terms, did we, but you wouldn't want me to be a goner, would you Oakley-dokely, baby. Anyway, I wouldn't want to be a goner. So please, Oakley, you gotta bring it.
Then the camera panned to a suited man. He looked like a business type, but just as ruthless as an outer-world bandit, perhaps even worse.
Hello Mr. Harrison,
You have something that we want. We want it rather badly. As you can see we'd be prepared to kill Ms. Ling here if you don't give it to us. There's an abandoned shuttle base above Hera. The coordinates are here. Be there by 3/23/ or we will regrettably have to terminate this young lady.
That is all, Mr. Harrison
That was only 3 days away and it would take two to get to Hera. Oakley explained that Ling was his old girlfriend who was a bit of a bitchy socialite but very rich. Her father ran Choi Jones Ling Corp., one of the biggest electronics companies in the 'verse. And that he may have 'borrowed' a valuable bit of R&D kit with lots of special features, from Choi Jones Ling Corp.
After some discussion, the Engima turned away from Atlas and headed towards Hera. You figured you could pay Mayor Payne for the fuel some other time, anyway.
You spent the two days journey planning what you might do when you got there, but not coming to many conclusions. You knew Hera was a wealthy planet that, as well as having a few industrial cities, was famous for its expansive mountainous estates, summer houses and hunting lodges for the super wealthy.
As you approached the station you sent a copy of the message to Mr Shan Ling, Jennifer's father and offered to help him rescue his daughter from the kidnappers. Before you could get a reply you docked onto the shuttle station. It was mostly abandoned but there were some signs of life, including signs of a Hornet ship docked on the other side of the station.
You opened the airlock to find the suited man and two of his goons with shotguns. He asked Oakley where the PDA was. Oakley explained that it was somewhere else and that you would get it once you knew Jennifer was safe. (Actually, Oakley had it in his pocket.)
The suited guy, asked Oakley to accompany him into the station to check that jennnifer was ok. After some negiotiation you agreed that the suited man would stay in the Enigma cargo bay as hostage whiole Oakley went into the station. He refused to say his name until TJ threatened him with his pasma gun in a slightly unbalanced way, and he revealed his name was Devon Smith. Sar watched everything hidden behind some crates, his laser gun trained on random heads.
Oakley went to the central Atrium of the station, with the two goons to find another goon holding Jennifer captive. She asked him if he had the PDA on him, but Oakley didn't answer. She then assured him that she was ok, and thanked him for trying to rescue her.
Oakley agreed that he would then go and get the PDA and they could make the exchange. He and the goons went back to the Enigma's cargo bay to make arrangements for the exchange. During the negotiations you all heard a shotgun blast coming from the station. At this, Sar opened fire on one of the goons. The goons fired back and winged Sar. Then TJ plasmaed one of them, and Sar killed the other. Smith just lay there with his hands over his head, until Sar shot him in the head.
During the firefight, Oakley dived for the airlock. As he did so he was hit by a shotgun and badly injured, but he had managed to close the airlock so he was left alone in the shuttle station, with the fight continuing in the cargo bay. He saw the final goon come round the corner, but then fall over dying. He had been shot with is own shotgun.
Jennifer emerged and told Oakley to come and see this thing she had to show him. She led him through the atrium to the control centre of the station. As she got there, she turned round and thanked Oakley for rescuing her and then kissed him. Then she asked him to count backwards from 5. Oakley reached 3 then fell unconscious.
When the firefight was over, TJ opened the airlock looking for Oakley. Sar followed him. When they got to the Atrium they found Oakley just coming round and they helped revive him. Soon you heard a drop ship launch from the station, obviously heading for Hera. Oakley discovered that his PDA was gone. Then TJ saw Jennifer's hologram in the control room; he went to chat with it.
Hey Oakley Dokely, baby,
It's me, well, yeah, I guess you can see that can't you? Anyway, by now I should be half way to Hera, while you're stuck up here. Thanks for the box, I'm gonna get quite a price for it. I know the right buyers, you see. Anyway, what am I thnking? Don't just stand around looking at me. You'd better think of something better to do with your last five minutes of life. Actually, perhaps standing around looking at me is the best thing to do with your last five minutes. I've engaged the self destruct for the base, see. And don't rush off, I've also fixed the docking system on your ship, so you won't be going anywhere in that pile of Go Shi. And don't even bother with the Hornet. That's not going anywhere either. So well, what are we going to do with the last five minutes, oh, silly me, that'll me four minutes now. I know, I'll sing you a song, that'll cheer you up....
And she began to sing some old traditional cowboy song in an affected way, as the self-destruct for the shuttle station ticked down.
You interrogated the system but were unable to stop the self-destruct, and you worked out that if the Enigma was trapped then it was by some remote system. You went to the airlock to find how your ship might be trapped. TJ remembered to check the outside cameras and spotted some robotic arm thing clamping the ship to the station.
Sar and Oakley opened the access hatch in the station and tried to work out how to release the arm. Sar got a bit frustrated and shot all the controls through with his laser, and it was soon clear you would now never be able to unlock the clamp this way.
You decided to just rip the ship away from the station. You all got on the Engima and evacuated the cargo bay, and as the self-destruct began its final countdown you fired up the Enigma, tearing a hole in the cargo bay.
The station blew up, big time, and the force of the explosion threw you away from the station and out of control for a few moments, but it did no further damage to the ship.
And so we leave you floating around above Hera with a damaged cargo bay, with Oakley wondering how to get his PDA back. He managed to trace one of Ling's summer houses in the mountains of Hera. And at this time, it seems, that is your only lead.

Aaron was contacted by Shan Ling, a man he has worked for on a number of occasions. Ling wanted him to pick up some medical equipment that had gone missing. She was Lorna McCarey, who had absconded from a medical research program. Much money had been invested in the program and she was thus valuable to the to the medical wing of Choi Jones Ling. Aaron asked about the the nature of the experiments but was told that info was classified. He was given a sub orbital craft and told to get his own pilot. He was also given a reader (Lorna was tagged and she could be identified by this) and a large refrigeration unit to put her in to keep her fresh should she not survive.
Aaron contacted Murray, some dodgy pilot who had done some work for some dodgy subsidiaries of CJL, and got him on board.
The two of you flew out to White Peak, Lorna's family's address, a hick town up in the mountains on the unfashionable side of Hera, that survived mostly by hunting and trapping. You landed half a mile out of town and walked the last bit, through the winter snow. You went in posing as some sort of mining equipment salesmen. Aaron tried to sell some of his stuff but no one was really interested. It was soon pretty clear that there wasn't any mining to be done up in therse mountains. Aaron noticed one of the townsfolk looked like his picture of Lorna, and made a note of the house she went to. It looked like she lived with her parents and younger brother.
The mayor of the town showed up and made it clear that he expected the two of you to go back to your ship and be gone by the morning. Aaron told him the flyer had been daamaged and that you would need help and also you would like to sleep in the village tonight. But it was pretty clear that no one trusted the two of you much and they wouldn't be helping any. Aaron asked if you could go into the church to pray, and though you could tell the mayor didn't really want to, he had no choice but to let you.
You went into the church. Murray watched a picnic vid-card which played some scenes from the last chruch picinic from a few months ago. You could see that Lorna was in these. The preacher turned up and told Murray what a close knit communitiy it was and how everyone would fight to keep what they had, and it was clear that they seemed to know what you were about (or that you weren't all you said you were) and that they'd be prepared to fight you.
Bored of the village, you made your way back to the flyer, checking out the lie of the land as you went. You hung out in the flyer until late making plans to kidnap Lorna.
You left the flyer at about half-one and made your round-about way towards the village. First thing, you spotted that a guard had been posted to watch the ship, but you managed to sneak past him without him noticing you (afyct). Then you made it round behind the village near to the McCarey house. You stealthily (kinda) made your way out of the tree cover, through the snow, towards the village.
Then suddenly a shot hit the gorund a few feet in front of Aaron. You froze and wondered what to do next. While you were considering it another shot hit the ground a few inches away from the first. You decided to make a strategic withdrawal back into the trees. You could see (with whatever night vision stuff you had) the mayor of White Peaks in the cover of one of the village huts with his hunting rifle ready.
Murray deicided to fire back, and took the mayor out in a single shot. You could hear noises of consternation and panic from the village. The villagers fired out a few times, but you could tell they couldn't really see you. While Murray was keeping their heads down, Aaron made his way aorund the edge of the village and approached the McCarey house from a different angle. Murray fired a few more shots and took down a couple more of the locals.
Aaron made his way up to the McCarey hut and climbed up the wall to look into the second floor. He saw Lorna and her brother hiding under a blanket with a candle. He tried to bash down the window but failed. Lorna saw him and screamed loudly. As Aaron began breaking the window in Lorna's father came round the side of the house with a shotgun. Murray saw this from his distant post and managed to wing Mr McCarey. But the father kept on his feet, trying to save his daughter, and managed to fire his shotgun at Aaron. At the last moment Aaron dived through the broken window into the hut, narrowly missing the shotgun blast.
In the roofspace of the hut Lorna's brother tried to stab Aaron with a penknife and Aaron tried to grab Lorna but she wriggled out of his grasp and down the ladder to the main part of the hut. Aaron followed narrowly avoiding getting hit in the head by a saucepan wielded by Lorna's mother. Lorna ran out of the hut, and Aaron folowed her. There, three villagers with shotguns confronted him, but Aaron managed to grab Lorna and give her a dose of general anaesthetic. He put her over his shoulder and tried to make his getaway. Lorna's father told the villagers not to risk a shot, but one of them shot anyway but his blast missed. Then Murray took him down.
Everyone made their way towards the flyer. As he approached the flyer, Aaron saw the guard you had evaded earlier. Aaron tried to make a run for the flyer, but the guard shot at him. He hit Lorna, and she began bleeding all over Aaron's back. Aaron also got shot by the guard, but dramatically managed to reach the flyer. Murray sneaked back into the flyer, avoiding the villagers who were searching the area. Aaron tried to save Lorna with his first aid skills, but she died. So he checked that she was indeed the correct target, with his reader device. Pleased that she was, he dumped her in the freezer thing. Murray took off, and you left White Peaks far behind.
You were happy to have the merchandise and headng back to Ling's when you got a vid-message. It was a representative of Blue Sun, apparently, wishing to buy your cargo. Aarion noticed on the scanner that a fast attack ship was following you. The Blue Sun guy offered a stupid amount of mony for the girl. Aaron agreed to the trade and told the Blue Sun guy where they should land.
Murray pretended to land but kept all the power on, and just as the fast attack ship touched down, and powered down, he took off again and headed for a nearby crevasse. The fast attack ship was slow responding to your surpirise maneuvre and you soon lost sight of it. You knew you would have to fly very low to avoid detection, and with some nifty flying, along the base of the crevasse, you were soon safe from the Blue Sun ship, and you headed back towards the Ling place.
Ling was happy that you had succeeded so efficiently with your mission, and you had a very fresh specimine in the freezer with only one bullet wound. He paid you and promised he would use you again if any similar sort of work came up.
Aware that Blue Sun seemed to know him by name, Aaron managed to get some genuine fake ID from Ling, too.
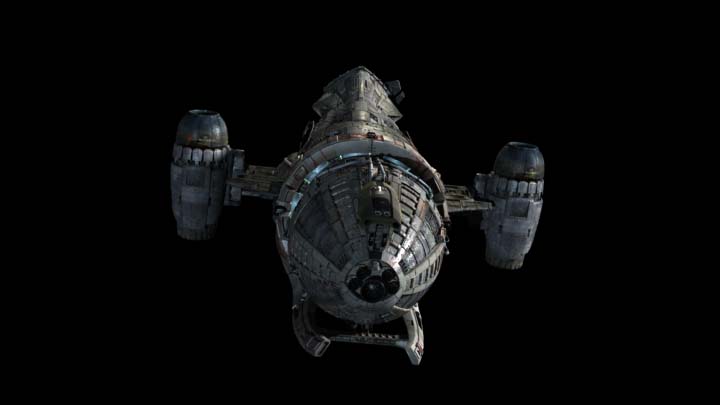
Faced with a heavily damaged cargo bay Oakley, Sar and TJ were forced to hangout in space above Hera for a week getting it all fixed up. Oakley also exchanged a few communications with Shan Ling of Choi Jones Ling Corp. He agreed that he would help look for Jennifer Ling and if he found her and brought her back alive and found the PDA then he would be allowed to keep the PDA. When the Enigma was ready the crew took it down to Damocles to see Ling. TJ stayed on board in case you needed a quick getaway.
Ling had decided that he would install his own crew aboard the Enigma to 'help' with the search. He appointed Murray and Aaron who had worked for him before (last week) and some other guy called Lonesome, apparently, who didn't seem too bright. They were all under orders to bring back Jennifer alive and to bring back the PDA.
Sar decided he would rather work for Ling than the Enigma and offered his services. So he said goodbye to the crew, but you had the feeling you might meet up with him again sometime under less pleasant circumstances.
Ling told you that some bunch of cowboys on an outer world had been trying to flog supposedly high spec electrical equipment for a huge price. You decided to check it out and so headed to Deadwood to look for the Galasky gang.
Your journey took four days. Murray was keen (in a laid back sort of way) to check out the ship and see how she handled, and it was soon clear that he was a pretty excellent pilot. Lonesome went through the ship looking for other people's food and eating it and messing up the galley. He managed to find some stuff in Aaron's room and messed it up. So later, Aaron went into Lonesome's quarters and hacked his pornographic vid-poster in strange ways. Eventually you landed in Casino City on Deadwood. TJ stayed on board in case you needed a quick getaway.
Murray and Lonesome openly wore their brown coats, and Aaron borrowed a brown overcoat to hide his nice core-world suit. Lonesome accosted a passer-by and asked where you might find the 'action.' He directed you to the Bright Lights casino, which was hard to miss, being a large building almost completely covered in neon lights and looking entirely out of place. You went in and it was a bit hick-y even though it clearly thought it was sophisticated. There were lots of saloon girls and they had holographic 3-d roulette.
Your attention was soon drawn to a gang of cowboy types who were being rowdy and acting as if they owned the place. They seemed to be getting free drinks and free women. They had some sort of argument over who could hit the chandelier with their pistols. After one of them missed, Lonesome interrupted and said he could hit it, and promptly did so. They bet he couldn't do it again, and they were right. But, impressed with his brown coat and psychotic manner they invited him for drinks, and pretty soon all of you (except Aaron who was hiding by the bar) were drinking with the rowdy bunch.
They were Joel Galasky some guy called Clancy, and two others. Joel was pretty quick to reveal that they were part of the Galasky gang, he was the leader, apparently, but his two brothers, Jesse and Jeremiah, were in charge. They were out selling some electronic stuff and soon they were all going to be rich. You asked him loads of questions and he was happy enough to answer, though he didn't know where exactly his brothers had gone. He told you that the supplier of the electronic device was 'tied up' at the moment. After shooting a few more chandeliers, the Galasky gang rode out of town, whooping it up.
You managed to find out where they lived, and headed back to the Enigma. You loaded up the hover-mule and prepared yourself for a fight. And planned to get to the Galasky base at about sundown. TJ stayed on board in case you needed a quick getaway.
The Galasky base turned out to be a small shack and an out-house. You approached it on foot, coolly, until you started getting shot at. Some of you dived for cover, some of you charged the hut and got shot. After a longish fire-fight you managed to take out the two people in the hut, and kept Clancy alive (Lonesome stunned him with his stun-gun). While checking out the hut Aaron recognised the sound of some sort of rocket launched attack, and told everyone to dive for it. Luckily, the rocket managed to miss most of the hut. You found a trap door in the floor and you (and Clancy) piled through it. The hut got pretty much obliterated just as you got down to the next level.
You found yourself in a dungeon-like old underground crashed spaceship. After Lonesome tortured Clancy, he revealed that Jennifer was in the crew quarters and the rocket launcher was out by a secret entrance by the engine pod. You split up with Oakley and Aaron going for Jennifer. Using Clancy as cover, Lonesome and Murray took out Joel and the other guy, and you took his rocket launcher. Oakley found Jennifer handcuffed to some pipes, and so he hit her and called her a bitch. She thanked him for saving her and said she knew he still loved her. She said she was forced to get the PDA and didn't want to do it, and she knew Oakley would understand and that they could work it out, blah blah blah....
Checking out the crashed ship Oakley liked the look of the scanners, so you thought you'd bring them back to the Engima. You also interrogated the computer and got signs of recent access to the coordinates of an abandoned asteroid mine, which you decided could well have been the Galasky brothers' destination.
So at daybreak you loaded up the mule and headed back to the ship. Lonesome decided to have Clancy chained up in his room, for the company, and Oakley chained Jennifer up in his room for similar reaosns. You took off for the asteroid mine which was about two days away. During the journey you managed to hook up most of the scanner parts.
As you approached it, you scanned the asteroid but there wasn't much sign of anything. You thought maybe a ship had been there recently, but that was all you could tell. There was no grav functioning and no life support anywhere. You landed on the asteroid and suited up to investigate it. Clancy had told you to expect five of the Galasky gang. TJ stayed on board in case you needed a quick getaway.
You managed to get through the giant airlock doors and went into the heart of the asteroid. You found the control centre. In the control room there were five bodies floating around in open-faced spacesuits. Their faces looked like jelly and they were covered in blood.
You found the generators and fired them up. It all worked perfectly and felt like this had all been used recently. You now had life support, grav and flood lights. In the more amenable conditions you inspected the Galasky gang's bodies, and it was like every bone in their bodies had been completely shattered. You interrogated the mine's security system and managed to find the cctv dump. You had a visual record of everything that had happened in the asteroid while the generators were firing.
On the screen, you saw two men in core-world suits waiting extremely patiently for the Galaskys to arrive. In the black and white footage you noticed their hands looked stange and maybe rubbery. Then the Galaskys turned up and took off their space-helmets and talked to the two suited guys for a while. Then they handed over the PDA and in return it looked like they would be getting a suitcase full of cash. But, then one of the suited men seemed to get out a small rod-like thing. As he did so the Galaskys fell to the floor in great pain, bleeding frome every handy orifice. The two men calmly put their space suits back on got ready to leave, and then powered down the generator.
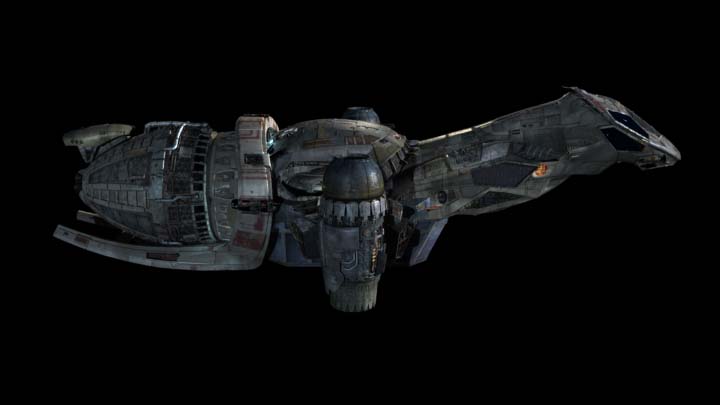
You were in the mined-out asteroid in the Fargo belt on the trail of (or just having lost the trail of) Oakley's PDA thing, and getting ready to leave.You took the memory dump of the station's cctv system. While you were on the station TJ (back on the Enigma) tried to get some info out of Clancy, but realised that he had already said everything he was going to say, especially as he had been tortured.
Lonesome took Jesse's body and dumped it in his room next to Clancy (who he calls 'Dog'). Then he went to play on the ship's computer. Lonesome and TJ had a bit of a stand-off about using the computer but sorted it out between themselves. They later had a weight-lifting competition which TJ won easily, earning him a bit of respect from Lonesome.
You tried to scan for any signs of the Galaskys' Hornet but it was too long gone and your scanners were too poor. You spent a few hours hooking up the external bits for the scanners you salvaged from the ship on Deadwood, and they did improve the performance somewhat. You took off and spent some time searching through the asteroid belt for the Hornet but could find no sign of it.
Oakley dragged Jennifer to the cargo bay. It seemed like she wanted to make up with him and that their relationship could be patched up if Oakley was prepared to work at it. She also offered to join the party crew for a sixth share of any treasure wages. Oakley dumped her in the airlock and threatened to send her out into the black. Jennifer (now desperate) revealed that she had taken the important bit out of the PDA (some chip) and hidden it. And so Blue Sun didn't have it, and she would share it with you. She said that she had given it for safe-keeping to a fortune teller called madame Clare Voyant at Bill's Amazing Circus Carnival on Hera. With little else to do, you decided to head back to Hera. Oakley kept Jennifer locked in the airlock and messed with the controls so that she could not accidentally be fired off into space, nor could she be released.
You knew you were low on fuel and food and money and should really try to sort out a way to get some ready cash. During the two days travel back to Hera, everyone tucked into the last of their emergency food caches. You noticed Lonesome made a bloody mess in the galley and then sat down to a meal of beef or pork or chicken or something.
After about a day Jennifer managed to attract Aaron's attention and said she wanted to tell him important stuff. Aaron overrode Oakley's security wotsit and released Jennifer and took her to his room. She tried to convince him that the two of them should go after the chip together and split the proceeds. She also sugested they might want to get married. But Aaron didn't want to listen to any of it, feeling loyalty to Jennifer's father, so he locked her in his room.
Later, Jennifer managed to attract Lonesome's attention. She asked him to take her to a shuttle so that they might run away together. Lonesome wanted to have sex with her, but agreed to do it for a quick flash of nipple. TJ and Oakley went to the shuttle to try to stop them, but TJ was having trouble disabling the systems, so Oakley shot some of the controls out. Murray managed to lock down the other shuttle from the main cockpit. Lonesome was sorry that they couldn't now elope (or at least have sex).
Aaron contacted Ling and told him that they would soon be landing at Bill's Amazing Carnival Circus and that he should meet them there. He told him they had Jennifer but not the PDA.
You landed at the carnival. Lonesome bought a load of hot dogs and took them back to his room. He then let Clancy go, and watched as the guy limped away as fast as he could. You all accompanied Jennifer through the carnival to look for Madame Clare. After a bit of searching you noticed four suited heavies who you thought might be Ling's men. Aaron waved them over but Oakley and Jennifer made a run for it. Murray chased after them.
Aaron tried to take command of the heavies, but a guy called Dominguez seemed to think he had seniority. He ordered his men to run after Jennifer. Jennifer, Oakley and Murray nipped through a bunko booth and then found themselves in a duck shooting gallery, and Ling's men arrived to cut them off.
You had a bit of a stand-off with Dominguez trying to prove his credentials and Murray not trusting him. You also noticed a Ling fast attack ship hovering high over the carnival area. TJ watched from a distance, behind the heavies, with his plasma gun ready. Aaron told Lonesome to shoot at Oakley, but Lonesome shot one of the cork guns at a duck, and won a cuddly frog.
Some kid tripped up and let go of his big bunch of balloons. As they floated between Jennifer, Oakley, Murray and the heavies, they all decided to make a run for it. As they did the heavies opened fire through the balloons and winged Oakley. Oakley, Jennifer and Murray nipped out the back of the shooting gallery and ran across the field. All the heavies followed, (with Aaron and Lonesome) except one who turned to see what TJ was up to.
As they ran across the field the heavies started firing at Oakley and Murray. Murray was hit, and dived for cover behind Mr Splobby. Oakley and Jennifer dived behind a hot dog stand. As Murray started picking off the heavies, Aaron tackled Dominguez and wrestled him to the ground.
Some caged wagon thing was on the way to the freak show, and Oakley jumped on top of it to make his getaway. But the moment his back was turned, Jennifer dived under the cart and legged it towards the next tent. Lonesome began homing in on Jennifer and followed across the field. Oakley jumped off and followed, too.
Oakley and Lonesome crept into the next tent and found themselves in the hall of mirrors. They wandered around a bit calling out for Jennifer, but couldn't find her. Some errant gun shots smashed some of the mirrors. Then Lonesome got frustrated and ran about smashing mirrors, but Jennifer was nowhere to be found.
Murray killed the last of the heavies and Aaron was involved in a terrible (in a sense) fist fight with Dominguez and got a bloody nose. Murray came over and slapped them both about for ordering him to be shot, when all he was doing was following orders.
TJ manhandled his heavy towards the Enigma and dumped him in Lonesome's room, with Jesse's body.
Everyone pretty much decided to go around the carnival looking for Jennifer. No one found her, and some of you began to suspect that Madame Clare was entirely fictitious. Murray bumped into an old friend from the war called Jimmy Chang. He was kind of pleased to see Murray, but looked preoccupied, and said he was busy and they soon parted.
TJ contacted the fast attack ship and told them that he had the PDA. He forced the heavy who he captured to confirm this to them. TJ told the fast attack ship that if the fighting continued and it didn't come down to land, then he would kill Jennifer himself. The ship said it would be down in 32 seconds. TJ also contacted the rest of the crew and told them they should get back to the Enigma as soon as possible in order to have it out with Ling once and for all. The fast attack ship is currently on its way to land beside the Enigma.

You were expecting an imminent visit from Shan Ling. TJ dumped Jesse's body on the cargo bay floor near to the airlock door. He then let his Ling-heavy go and told him he was free. The heavy went to the airlock to greet his superiors. Murray got back to the ship and went to join TJ overlooking the cargo bay, while Oakley hung around a distance from the ship and watched the Fast Attack Ship land. Dominguez turned up with a couple of men, and met Ling. Ling emerged from his ship flanked by four bodyguards. All nine of them made their way towards the Engima. Ling sent in a man to make sure the coast was clear, and then some of them went into the Enigma to talk with TJ, while the rest guarded the outside.
TJ seemed to think that the deal with Ling was over and they could part amicably. Ling was surprised as he sent you to get the PDA and Jennifer, and you had neither. TJ told Ling about the recording of the asteroid incident and said he could have the tapes. Which he was happy to get. You came to the understanding that you would leave Hera as soon as possible and never come back and should Ling ever see you again he should have you shot.
Oakley came back to not make a copy of the tape, and not be dead. And Ling said that Oakley especially would be shot if he ever saw him again. You did ask for a tank of gas, though, to make it off the world which Ling was happy to give you. Murray decided that he didn't want to work for Ling anymore (and Ling didn't really want Murray working for him either) and Oakley and TJ said they could do with a good pilot but the pay was really rubbish (if any). Some of the other crew may have left Ling's employ and decided to join the Enigma then, too. Maybe.
While you were refuelling Oakley went out to have one last look for his girlfirend. He showed her picture to some people but no one could really recognise her. Then he thought he saw her wandering through a crowd, and he shouted out and gave chase Jennifer turned to see Oakley and fled as fast as she could.
Jimmy Chang (Murray's old mate from 'hospital') turned up and said he'd appreciate passage off Hera; he didn't seem to be that interested in the destination. Murray told him to wait and see what the captain(s) said about it. He seemed to be in a big hurry to leave.
Bill's Amazing Circus Carnival was, of course, in this area of Hera to celebrate the opening of a brand new Alliance Fast Attack Ship facility. It was a huge factory by the side of the carnival. And it was due to open next week bringing many jobs and prosperity for the planet under benevolent Alliance rule.
As Oakley tried to catch up with Jennifer (he fired a warning shot at her) suddenly the side of the factory exploded covering Oakley with debris, but Jennifer was caught more by the full force of the huge blast and buried in mangled concrete and metal. Oakley also saw some dead bodies and a little girl running around screaming, covered in blood. Oakley ran to dig Jennifer out; she seemed to be alive but was badly cut and bruised and had some bones broken. He called Murray to come over with the working shuttle to pick them up, which he did.
Once you were all safely back on board, and the unconscious Jennifer handcuffed to a table in the infirmary, and Jimmy Chang on board too, you thought about getting out of there as quickly as possible but thought it would look a bit suspicious. Soon enough you learned that there was a no-fly order for unofficial transport. You also got sent a list of suspects, which seemed to be those of the factory builders who served the Independents during the war. You noticed the name James Wyatt Chang on the list. Jimmy Chang insisted he was innocent but didn't want to give himself up because he didn't trust alliance justice. Murray was inclined to agree with him.
Then there was a knock at the door. It was Sheriff Connor come drumming up support for a posse to try to chase down the perpetrators of the appaulling act of terrorism. You agreed to be part of the posse and told Connor you'd await orders.
Murray had a chat with Chang to see if he thought he might be capable of being a part of the terrorists. He didn't really know what to think, but knew the man wasn't entirely stable.
You also woke Jennifer up with some adrenalin and questioned her about the location of the PDA-chip. She didn't make much sense, but seemed to want to marry Oakley, and said she was prepared to share the money she could get for the chip with you. But she was in a lot of pain. You did your worst to ease her pain and she went unconscious again.
Then there was a knock at the door. It was corporal Stevens and twenty Alliance troopers. They needed you to take them over to Forest Glade, on the other side of the planet where one of the suspects was thought to be. The twenty troopers piled in but didn't cause much of a fuss. They even gave you some of their rations. Corporal Stevens went up to see the cockpit. He caught a glance of Jennifer but didn't seem to be too suspiscious of her. He wasn't even that suspicious of Murray's brown coat, who was trying to keep out the way of the troopers, in the cockpit. All the while Chang hid in the passengers quarters, and was never in danger of being discovered by the troopers, except when you kept buzzing him on the intercom to see if he'd been discovered yet.
You landed in Forest Glade without incident and dropped the troops off. Stevens thanked you for your loyalty, but it was clear he expected you to go back to sheriff Connor and see what else needed doing. But you didn't seem to have any clear orders so you decided it might be a good opportunity to skip planet.
You headed for Borus, the desert-y, sea-y, forest-y planet, which was close by and as good a place as any to get rid of Chang. And maybe somewhere you could earn a dishonest crust. On the way there you woke Jennifer up again and set her ankle very badly. She said she'd join forces with you when she was better and you could share the money. She also said (with seeming sincerity) that if she died, then Oakley could have her body. During the flight to Borus you also got to hear a few more of Chang's views and although he still denied it, it became clearer that he could have been responsible for bombing the factory.
So, you've just landed on Borus and dropped Chang off. He promised he'd help you out if ever you needed it. You're hungry and you don't have much supplies or any job lined up. You're tempted to rob a bank. It's easy money, they say.
